Showing posts with label Preschool Explorers. Show all posts

Thursday, September 24, 2015

Preschool Science: Color

Preschool Explorers (my weekly preschool program that alternates between art and science each week) started up again this week and we began with a mix of art and science: color. 

First, I read Baby Bear Sees Blue by Ashley Wolff. I decided to start here so that the kids would have a chance to identify each color. 


After we had talked about each individual color, I brought out Mix it up! by Herve Tullet.
This gave us a chance to talk about how colors mix. The kids loved it (of course). 

I gave a brief explanation of the stations and then they were off. 

The Stations: 

1 - Color Wheels (Color Identification)

Take some printed or colored color wheels (preferably on cardstock or glued to cardboard). Add some clothespins with the colors written on them (in the appropriate color, of course) and you have a matching plus fine motor activity. One little boy liked this one so much, he wanted to take a color wheel home with him. 


2 - Paint in a bag (Color Mixing)

The kids squirted washable tempera paint into sandwich baggies and then squished the bag to mix the color. I showed them how to "paint" with their fingers by laying the bag flat and drawing on it with their fingers. 


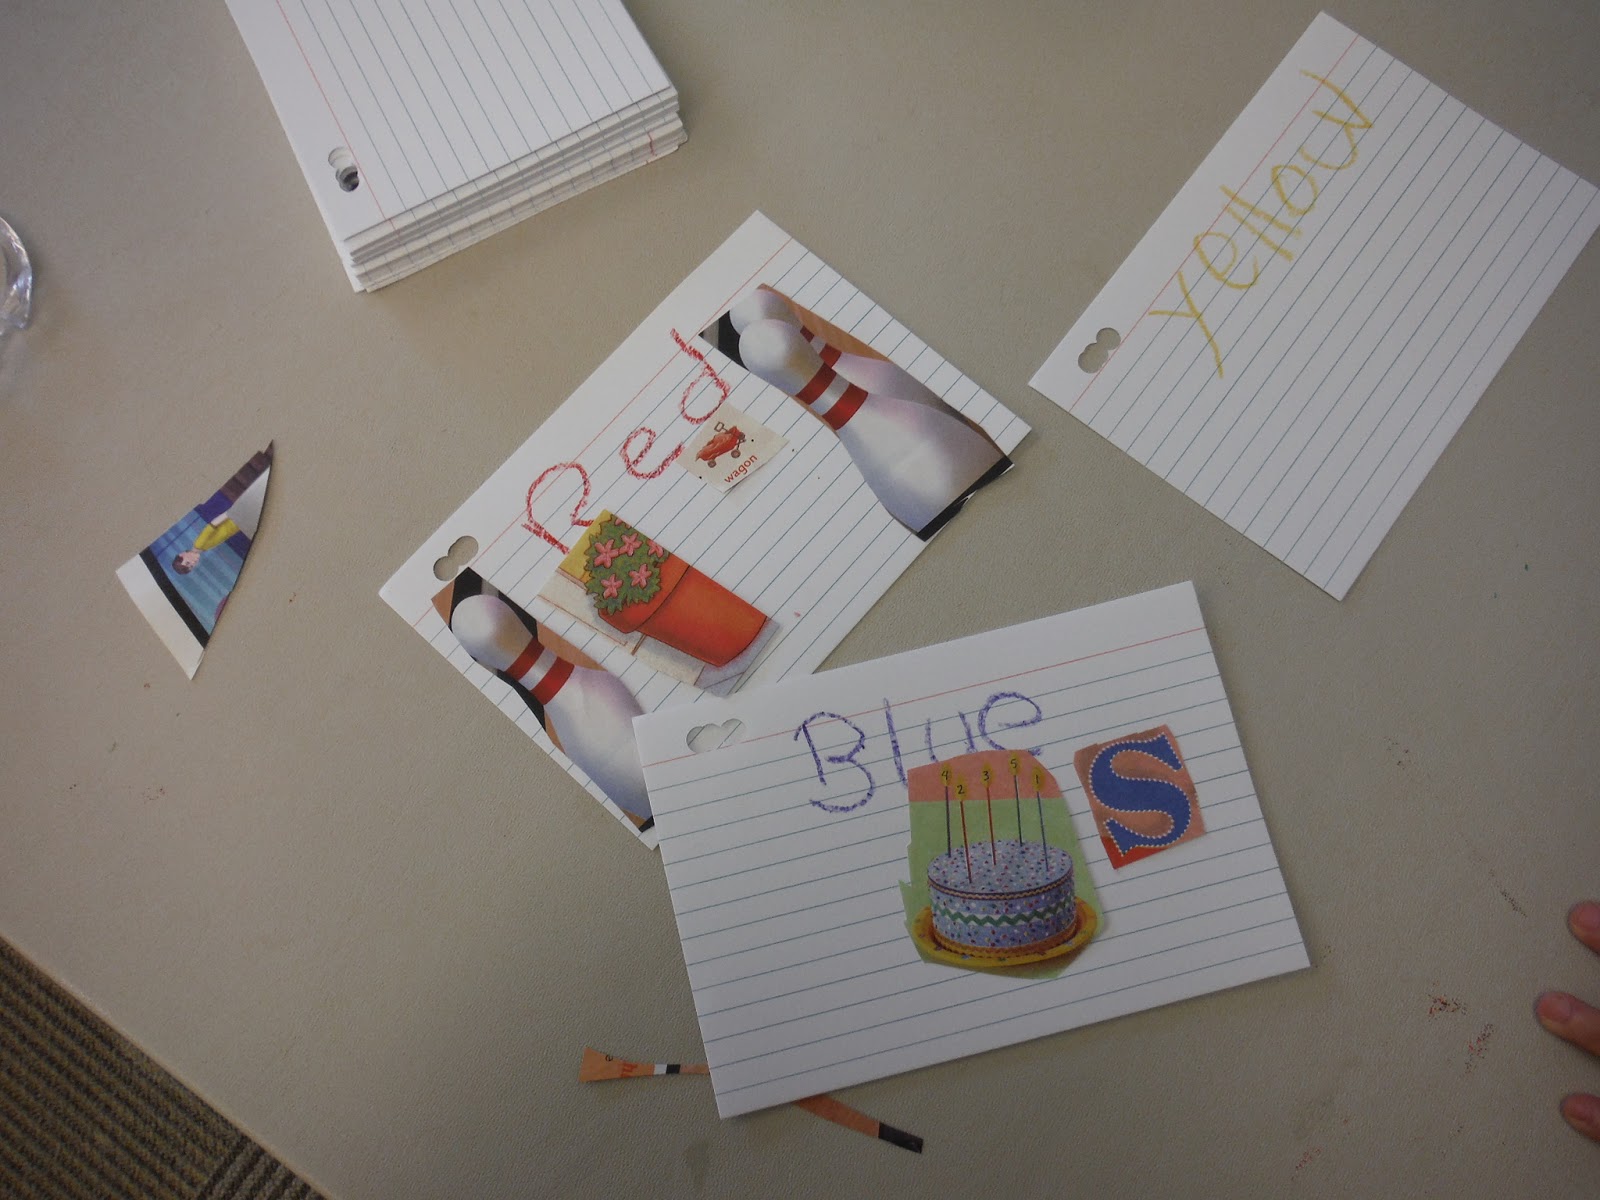
3 - Color Books (Color Identification) 

I put out index cards, magazines, and crayons and the kids made their own color books. Shower curtain rings provided a way to keep it all together. 


4 - Watercolor Mixing (Color Mixing)

Three bowls with red, blue, and yellow, a bowl for mixing, and an eyedropper or pipette are all you need to make some color mixing fun! 


I provided coffee filters for the kids to see what color they had made (it's sometimes hard to tell with watercolors when they are in the bowl). 


Color most frequently made? Brown. 

5 - Pom Pom Matching (Color Identification)

I wrapped paper towel tubes with colored paper and added velcro to one side to make them stick to my flannel board. The kids would take pom poms and drop them down the chute of the same color. One little girl dropped with one hand and caught with the other. Others just liked the watch the pom poms shoot out. 


At the same station, I had muffin tins with circles of colored construction paper in them. The idea was to put the pom poms in the space with the same color. I found some scoops at Lakeshore Learning  that were used to pick up the pom poms. 


I find this particular program works well at the beginning of the year when some kids are just aging into the program and others have left for kindergarten. There is a range of levels of activity here and my barely three year old was just as interested as my four-going-on-ten year old. 

Wednesday, September 9, 2015

Preschool Science: Water

For this preschool lab, we tackled water. Well, not literally; that would be difficult. But we did spend the better part of an hour exploring different aspects of water (which, frankly, is fascinating. It's all around us yet defies most rules of physics). I was inspired by this and this.

I started out by reading Heather Fell in the Water by Doug MacLeod and Craig Smith.


Then we did a floating egg experiment, which not only allowed us to talk about "sink" and "float", but also set them up to experiment on their own when we went to the stations. 

I got the idea from here, though I simplified it to just be about an egg (click the link for other fun ideas!). We tried an egg in fresh water and then added salt bit by bit until the egg floated. While I poured and mixed, we talked about density and how much salt it might take to make the egg float. 

Once we got the egg to float, it was off to the stations!

Stations: 

To prep the stations, I put plastic tablecloths over each table and then layered a beach towel (from home) on top of that. (Hence the colorful pictures...). This kept the mess - or, in this case, the wetness - from going everywhere. Just remember to bring a bag to hold all the wet towels you'll be taking home to wash. 

1 - Swimming Raisins


Unfortunately for our first station, this one was a bust. Supposedly, a raisin will sink in regular water, but will rise and fall with the bubbles in sparkling water. We tried it a few different ways, but this one never quite took off. I'm gonna go with: it's the "learning about the scientific method" station...

2 - The Volume of Water


I put out a dozen plastic containers of different sizes and heights and capacities and asked the children to pour the water from one container to another. Even though the shape of the water changed, the volume remained the same. Also, pouring water is fun.

3 - Water Absorption


One of my co-workers donated a bunch of Talenti gelato containers and they are awesome! (Both the jars and the co-worker). I've used them for all sorts of things, but this time I put out sponges in different sizes and asked the children to put a sponge and a little water into a container, seal the container, and see if their sponge could absorb the water as they shook the container. 

4 - Sink or Float


This station was the most fascinating to the kids. I had bowls of water, a worksheet, and a ton of objects for the children to test. I also put out salt in case they wanted to try to make something float. This station got the best conversations between caregivers and children as they tried to guess what would happen and then tested it out. Also, as you probably already know, dropping things in water is fun.

5 - Water-resist Painting


I pulled out my white crayons for this one. The kids drew something with the white crayon on white paper and then painted over it in watercolor paint. Above, you can see the fish emerging through the paint. A lot of kids really liked this one, though they sometimes had their parents draw the first part because the white on white was too complex.

This was one of my favorite labs - simple concepts but all fun to play with (except the raisins) and minimal mess. I'll be repeating this one.

Wednesday, June 17, 2015

Preschool Art: Keith Haring

For this session of Preschool Explorers, we talked about Keith Haring and his artwork. Caveat: you need big big paper. I happened to have some rolls that someone donated, so I was set, but without those rolls this would not have been possible. 

First, we read books by Keith Haring. I read Ten and Big. We talked about the dancing figures and what they might be doing and we tried to twist our bodies into the same positions (hilarity ensued). 


We also looked at some of the drawings in I Wish I Didn't have to Sleep. 


This book is fascinating and asking the kids what they think the painting means is a treat. 

Then it was our turn! 

I rolled out the big paper so each kid could have a piece. They lay down and their grown-up companion traced their outline. Then the kids decorated themselves with all sorts of crafty odds and ends that I provided.  

I had hoped more of them would choose interested positions, but most of them just lay down and used that shape. 

Here are some of the results (in varying stages of done-ness):


The parents particularly loved this session and there was talk about hanging the results on bedroom walls. I saw some parents write the date on the sheet so they could compare the size as their preschooler grew (and we all know that happens way too fast....). 

Wednesday, June 3, 2015

Preschool Science: Sound

For this Preschool Explorer's session, we explored sound.

I started by reading Squeak! Rumble! Whomp Whomp Whomp! by Wynton Marsalis.


Then we talked about sound and different sounds we hear during our day. I also brought along a non-fiction book about sound that had a picture (ok, an illustration) of sound waves and we talked about how sound makes waves and makes things move. 

I had stretched a balloon over a large plastic bowl and I put some salt on the balloon. Then I invited the kids to make loud sounds near the balloon to see if the salt would move. And, yay us, it did bounce when we made loud noises near it. I had the kids tap sticks near the bowl, but I'm sure other versions of noise-making would work as well. 

Then we went to the stations: 

1) The Cup Telephone
The simplest and somehow the most popular, I used two paper cups and some string and made an old-school string telephone. One little boy was just fascinated by it and his mother asked me "why does it only work if the string is taut?" so it was science learning for everyone!


2) The Wire Hangers
Because life is all about ups and downs, the same table that held the most popular telephone cup also held the least popular wire hanger activity. Tie a hanger to some string, wrap the ends of the string around your index fingers, put your hands over your ears, and bang the hanger into things to hear what it sounds like. You can see the most adorable child ever doing this experiment here. I tried to encourage kids to do it by doing it myself, but I guess no one wanted to look like a weird lumbering hanger-nosed elephant so most kids stayed away. Sigh. 


3) Quiet or Loud
Benefit of having a baby at home: lots of formula containers. I put out several containers as well as a plethora of random small items. The kids put the things into the containers, put the lids on top, and shook. I asked them to say which was loud, which was quiet, and which was their favorite. Honestly, shaking things up is their favorite. 


4) The Sound of Beans
I had several different sizes and kinds of containers and about a cup's worth of beans. The kids poured the cups into the different containers and listened to the sounds it made. Simple, but fun.


5) Make a Kazoo
I rarely do crafts during Preschool Lab - I prefer to make it a time of exploration - but this one was too good to resist (and I didn't have enough boxes for a rubber band guitar station). There are a lot of different ways to create these kazoos, but they all take paper tubes, waxed paper, and rubber bands. I ended up basing our craft on this set of instructions.


There were lots of good ideas here, like the model eardrum part that I used at the beginning, but I didn't get a chance to use them all because of time/available materials/point at which I started planning. It was a good session - just be ready for it to get a little loud. :-)

Monday, May 11, 2015

Preschool Science: Extreme Weather


This week for Preschool Explorers we tackled Extreme Weather. 

I started by reading When a Storm Comes up: a Rookie Read-aloud. 


This book turned out to be perfect because it was just the right level and length and it hit on every major type of storm, as did the stations I had set up. Only problem was the trim size, but I had a small group and everyone got to see the pictures. 

Stations: 

Station #1: Tornadoes!
Based on this link, we made tornadoes in a jar. I put out empty gelato containers, a bowl of water, and a bottle of dish soap. The kids added water to the containers, squirted in some dish soap, closed the container and shook it. Voila! Tornado in a jar. This particular experiment worked even better after the jars had been sitting for a while, so kids came back to this one a couple times. 


Station #2: Thunderstorms!
This station had three parts. 

First: the clouds. I brought bars of Ivory soap (it HAS to be Ivory soap, don't try it with anything else!) and cut them in fourths. The kids put down a piece of waxed paper in the microwave and microwaved the soap chunks for 30 seconds. Instant clouds. For more information and awesome pictures, check this out. Extra bonus: the kids love the buttons on the microwave. 


Part two: Rain in a jar. I put out some more empty gelato containers, some watercolor paint, a can of shaving cream and some water. The kids put water in their jar and then added a shaving cream cloud. Using the droppers, they put watercolor into the cloud until they could see it "raining" underneath.


The eyedroppers are everyone's favorite thing, so they barely watched it rain before adding more and more color, but the idea was fun. For a great picture of the actual jar thunderstorm, look here. (I chose not to use the paperclips).


Part three: Lightning. The idea is simple: blow up a balloon, rub it on your head, go to a dark room and touch the balloon with a spoon. You should be able to see the static electricity, which is what lightning is (on a much bigger scale, of course). This station was most unfortunately a dud. We used the supply closet (which the kids always want to go into anyway) and we managed to hear the spark, but never actually saw it. Despite this, everyone enjoyed rubbing the balloon on their head and then having it stick to them. So we had that going for us. I got the idea from here.

Station #3: Hurricanes!
I challenged the kids to build a house that would withstand hurricane-force winds. They had blocks, sponges, cotton balls, playdough, and popsicle sticks. When they had built something, they turned on the fan to see if it would blow over. Some of the kids used the playdough to stabilize the blocks, which I thought was a genius idea. (And, thank god, they cleaned it up before they left so I could still think it was a genius idea).

Station #4: Floods
I put out small trays, rocks, sugar cubes, and small toys. The challenge was to put sugar cubes and a rock in the tray, then put a small toy on top of each. When water was poured in, which toy got wet first? 

Of course I expected the sugar to dissolve first (which it eventually did), but it took too long to really appreciate. The kids ended up playing with the toys and knocking them in to the water and crushing the sugar cubes with the toys. Since no mess was made, I figured why not? They are still exploring dissolving and flood waters rising, so more power to them. 

This particular theme was very well received. Many participants did the stations more than once and while some themes have them leaving within 20 minutes. I actually had some stay almost an hour to explore. 
Related Posts Plugin for WordPress, Blogger...