Showing posts with label Teens. Show all posts

Wednesday, February 24, 2016

Tween Program: Cookie Wars

I love baking shows (and just discovered "The Great British Baking Show" which, if you love baking shows, you should have been watching yesterday!) and I'm in to Cupcake Wars on Netflix. Seems like a program ripe for the tweening (new word?), so that's what I did.

Presenting: Cookie Wars! Tween Style!

I had 22 tweens (ages 10 and up - most of them were 10-12) come out for the program. Before they got there, I put out all seven of my tables and covered them in tablecloths from the Dollar Store. DO THIS. It makes clean up a million times easier. (You already knew that, right? I learn things the hard way)

Six of the tables were for the competitors and allowed us to divide quickly and easily into teams. Basically: were you standing at the table with that person? Voila! Team members.

I had materials for four challenges, but we ended up going with three.

First one, taste. They got Nilla Wafers and a secret ingredient of fruit (strawberries, bananas, blueberries, and raspberries) as well as other ingredients (candy, pudding, whipped cream, chocolate sauce, jam). They made seven identical "desserts" and one person from every team helped me judge, scoring 1 for gross and 5 for awesome.


Next one: taste, part two. This time they had Little Bites and had to make something delicious with them. Again, one person from each team helped me judge.


We were running short on time (I had one more taste challenge involving small chocolate chip cookies, but I let that one slide) so I jumped to the last one: appearance. Everyone got a sugar cookie in a bowl and could decorate as they wished as long as it fit the theme: books.

While they made their creations, I tallied up the points so far. I then judged the appearance ones myself and added points to each team at the end.


The Three Bears. 
The kids had a great time with this one and they got to take home their sugar cookie scene so they were happy. The team with the most points got  full sized Hershey bars. Yum!

Things to consider: OMG, you guys, the things I had to taste. It was SO GROSS. Blueberries and smarties? Gummy bears and chocolate pudding and mint? I gave a lot of 1s and 2s. But, on the other hand, the kids thought the banana chocolate pudding combination was disgusting, so maybe I'm the one with the wrong tastebuds.

Verdict: very fun, very chaotic, and a great way to use up leftover candy from December's Gingerbread Houses. (Link is from 2014, candy I used was from the 2015 iteration of the program).

Tuesday, October 27, 2015

Sugar Skulls for Dia de los Muertos

Last October, I did a pumpkin palooza program that was fun for the whole family. This year, my town was putting on a Halloween/pumpkin thing, so I decided to take my October in a different direction: I made Dia de los Muertos sugar skulls with my tweens. 

I took a lot of instructions and ideas from this website and I highly recommend you check them out. I didn't try another type of meringue powder - I just straight up ordered the one they recommended - but it worked like a charm so I'm willing to believe their expertise on pretty much everything here. 

Anyway, I bought myself one of these pans and the right meringue power and was ready to rumble. Oh, and sugar. LOTS of sugar. Like, a huge bag from Costco. 

I started prepping two days beforehand. I figured that would give me time to find alternate solutions just in case everything fell apart. The Mexican sugar skull ladies knew what they were talking about, though, and it all worked like a dream. 

So first, I made the skulls: 


I had 25 kids signed up for the program and I made 30 skulls just in case. 

Once they came out of the mold, I just let them air dry. 

The pan I bought would have allowed a front and back of the head, but I decided it was too much trouble to do all the scooping, etc., that the sugar skull ladies recommended for large skulls, so I stuck with just the fronts. 

On the day of the program, I made a bunch of frosting in bags and put out sprinkles and mini chocolate chips.

Rubber band the back of the bags! You would not believe how much frosting kids
can squeeze out the back of the bag if you don't! (Yes, this is bitter bitter experience talking, here)

Then I let them go at it. 


I wanted to give the kids a chance to make skulls themselves, so I bought one of these candy molds and had four kids come up at a time to make their own tiny skulls. We mixed the sugar, the meringue powder, and the water and pressed it into the molds. Then we popped them out and I put them out to dry by a fan. 


I was hoping the small size plus the fan would be enough to dry them in an hour, but results were varied. Some worked, some fell apart completely. I did feel it added to the program, though, so I would probably do this again despite the number of crushed skulls. 

This tiny decorated skull had "Princess Leia buns" according to its creator,
but I can't help but see Carmen Miranda. Just me?
All in all, it was a fun program that yielded pretty spectacular results. 


As far as consumability: I told the kids that everything was technically edible, but that it probably wasn't a good idea to eat it considering how long it had been out in the open air. They also learned first hand that the skulls were maybe not the cleanest things when they dug their hands into the sugar mixture to make the mini skulls. 

Feliz Dia de los Muertos! May your carpets remain frosting free!

Thursday, October 22, 2015

Frankentoys

I was cleaning out the office closets at the end of the summer and came across two bags of stuffed animals that someone had donated. Which got me thinking. 

Then we had a town-wide garage sale event (I bought an enormous stuffed bear for the kids to read with for, like, $1) and I figured this was it: it was time to chop up those toys in to FRANKENTOYS!

The set-up for this program was quite simple: the toys, some good scissors, some needles and thread, whatever embellishments I had laying around, some extra stuffing just in case, and hot glue. The program was for 10 and ups, so I was comfortable that they could use the glue gun on their own. 

There was only one rule: if you cut something, you had to have a plan for it. No just ripping in to things willy-nilly. 

At first, it seemed like this rule wasn't going to be necessary. In fact, the entire program teetered on the brink of disaster when the girls started picking up stuffed animals, dubbing them CUTE!! and mourning any cutting that might have to be done. It didn't help that the newspaper reporter who had come (entirely of her own volition - I really am lucky! And that wasn't sarcastic - I consider myself very fortunate to have proactive photo takers!) kept saying "are you really going to cut that one?"

But then. Oh.... glorious then. 

Someone cut one. And then someone else cut another one. And then another one. And suddenly, the whole thing snowballed into one big cutting, gluing, un-stuffing frenzy. I found myself repeating the rule a few times to prevent mayhem.

Some of the results:

Headless by choice, thank you very much.
That tree? Is glued to his butt. Also, he's on wheels. 
That fish head is a measuring tape that comes out when you yank it.
Glorious does not begin to describe it. 
The head-swap twins. 
  
Cerberus. Three headed with yeti arms and a cape
Even I, the queen of anthropomorphising everything under the sun, got in on the action.

Especially when this yeti lost his arms to Cerberus.

Doesn't he look just completely bewildered and depressed about his missing arms? 
 I had to make it better.

So I did:

Less flummoxed, more "dear god, why!!"
Each participant ended up taking home 2-3 toys in the end.

And the thought of what might happen to their toys at home after this program... Yeah, it keeps me up nights.

Monday, August 17, 2015

Charm Bracelets for Tweens

I'm always getting ideas from the Klutz books and this time around we made charm bracelets.

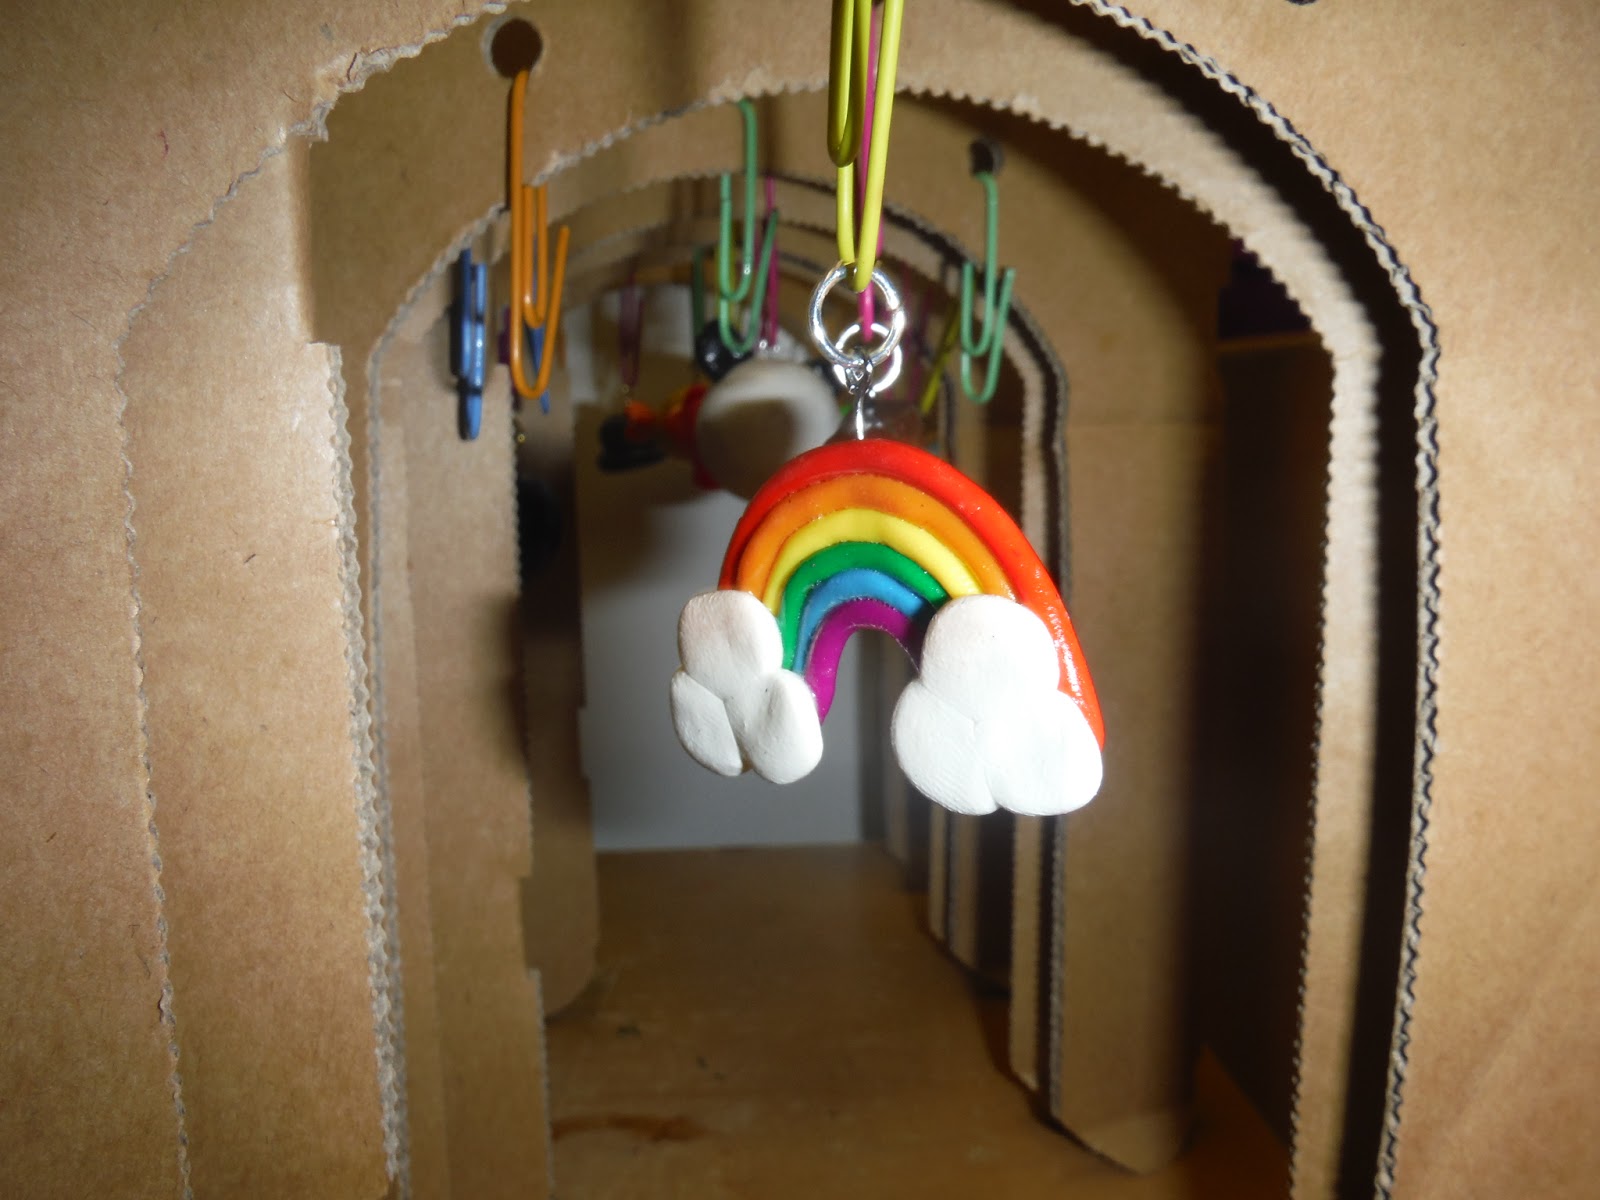
I had the original book, but that didn't have enough materials for my group of 20 kids (ages 10 and up), so I ended up buying 7 yards of bracelet chain, lots of eye pins, jump rings, some hook closures, two jewelry pliers, lots of Sculpey clay, and glaze. My toaster oven, a huge disappointment for my cooking programs, redeemed itself during this program and turned out some lovely charms.

So I put the clay on the tables, made the book available if they needed ideas, and let them go to it.

Here's what I learned:

This program took much longer than I thought it would. I had pre-cut and hooked the bracelets, so those were ready to go (highly recommended) but the actual baking and putting on of jump rings and glazing took forever.

I decided to do the baking in batches and the first batch went in at the ten minute mark, but while I had anticipated making two batches, we ended up making four.

Next time, I'm definitely blocking off 2 hours to get the entire bracelet made.

On the plus side, the results were very cute and individual in the best sense. I think the charms might be too big to comfortably wear on a daily basis, but the kids were very proud of their results.

Gumball machine and moon on the glazing rack. 


Proudly wearing the dragon he designed himself. 

More good news: since I bought the materials more or less in bulk, I have enough stuff to do this again. I definitely will.

Monday, May 11, 2015

Cake Decorating for Tweens

Here's a program I did with my tweens a few weeks ago: Cake Decorating. We've done cupcakes before (I showed them some fun piping techniques and we went to town) but this was an entirely different ballgame. 

But before I go on, here's my warning. This one is neither cheap nor easy, but holy smackers is it fun and worth it. I had kids from 8 to 13 and they LOVED it. 

Here's what we did. 

Before the program, I baked 10 cakes from a mix. That's right, ten. (I used a cake mix, which made it easier, but still...)

I put icing on five of the cakes and stacked the other five on top, giving me five two-layer cakes. I cut those cakes into mostly square pieces (each cake gave me about 8 squares, give or take) and put those on small cake boards. Then I spread icing on the outside and top of each square so the fondant would have something to stick to. 

Granted, you could probably just make five cakes and split them into squares, but I really wanted the kids to be able to decorate the sides of the cake as well and you need a double layer to get enough space for that. 

I then put green frosting into piping bags. One of the bags had a writing frosting tip and the other had a grass frosting tip. I made about 8 grass tipped bags and 6 writing tipped bags for everyone to share. The favorite was definitely the grass one - I should have made more of those. 

Then it was time for the program. I put out parchment paper and a cake square at each place and spread fondant tools, rolling pins, scissors, paintbrushes for the fondant glue, fondant glue, and the frosting bags evenly across the tables. 

Once the kids arrived, they received several different colors of fondant. They rolled white fondant to cover their cake. Then I showed them how to use purple and pink to make a snail and green to make a frog. There was also yellow fondant for flowers and embellishments. 

Snail and frog pre-icing. 
They placed their snail and their frog on their cakes and then got creative with the frosting making grass, vines, and whatever else they could think of. I walked around giving hints and helping execute their ideas. One of the boys (that's right, the BOYS) actually showed the kids around him how to make roses!

Here are some of the results: 


The roses. He figured this out by himself!
Someone used the fondant to make a butterfly. 
Fondant flowers. 
Getting creative with vines and flowers. 


It was great fun and the kids had a blast decorating their own small cakes. The results were stunning and, it was reported to me later, delicious. 

Sunday, March 29, 2015

Fashion Forward: A tween fashion design program

I used to be a huge fan of Project Runway (haven't seen the latest seasons cause we don't have cable anymore which makes me sad and, while I'm on the subject, Tim Gunn is a master and a gentleman.... but I digress), so I thought I would use some of that enthusiasm to create a teen/tween program.

First, you need dolls. I made some fleece dolls for last year's program, so I brought those out again, and this year I also added some Groovy girls that I picked up at various garage sales. The girls (I had all girls this year, though that has not always been the case) could pick the doll they wanted to dress.

The fleece dolls. 
The Groovy Girls. 
I then put out fabric, safety pins, hot glue guns, and a set number of threaded needles. It's easier to start the program with the needles already threaded, though I do end up threading them again as we go. I put out ten needles and make extra sure that I get ten back.


Threaded needles in their holster. 
I also put out buttons, feathers, sequins, beads, pom poms, and ribbon in case the kids want to add embellishments to their outfits.


They don't really need a lot of instructions, but I let them know that the dolls will be on display in the library and to keep in mind hairstyle and shoes (to "use the accessory wall very thoughtfully," to quote Tim Gunn). I also make it very clear that they may glue outfits together or glue accessories to the outfits, but they may NOT glue anything to the dolls. Some of the girls choose to work in groups, some prefer working individually.

I spend my time during the program helping with ideas and giving suggestions as needed. And threading needles. I re-thread a lot of needles. Because it can take some time to help each group or kid, I suggest having at least one other person volunteering or helping so that no one has to wait very long.

Here are some of the results from this year (the girls name their own dolls and then tell me something about them).

Alyssa has flowers in her hair. 

Bella works as a farmer.
(Seriously. That was on the information card her dresser wrote for her.)

Crystal is bold with patterns. 

Mary has a fascinator in her hair which is amazing. 

Note Julianna's awesome shoes made of flowers. 

Other iterations of the program that have worked in the past:

Once, I received a donation of large pieces of fabric so that year everyone worked in groups and chose someone from their group to be the model. The rest of the group dressed that model and then we had everyone walk a runway and fill out comment cards to vote for the best one.

Another time, I had the girls work in groups and then we displayed the dolls for a month near the entrance of the library. Patrons were invited to vote for their favorite and the winners got a prize.

The program has always been a hit. The kids always surprise me with their creativity and their capabilities and being able to display the results in the library makes everyone proud.
Related Posts Plugin for WordPress, Blogger...